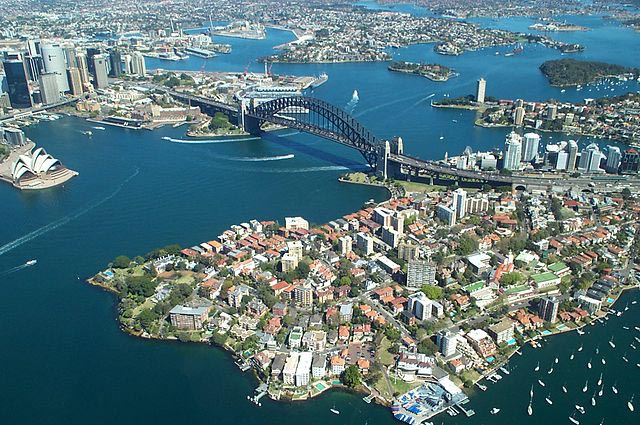
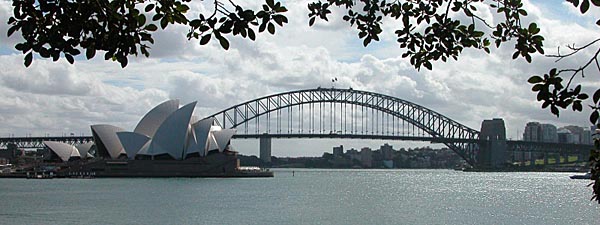
Sydney
Harbour Bridge, Sydney, Australia
The copyright holder of
this file allows anyone to use it for any
purpose, provided that the photographer is
credited.
The image
was added to Wikipedia by Rodney
Haywood. For more details click on
the image.
Architect
|
Dorman Long
& Co
Thomas S. Tait, of John Burnet & Partners.
|
Date
Built
|
Opened to
Traffic February 1932
|
Location
|
The southern end of the bridge is located at
Millers Point in The
Rocks area, and the northern end at
Milsons Point in the lower North Shore area. |
Description
|
This file is licensed under the Creative
Commons Attribution-Share
Alike 3.0 Unported license.
More details can be seen by clicking on
the image.
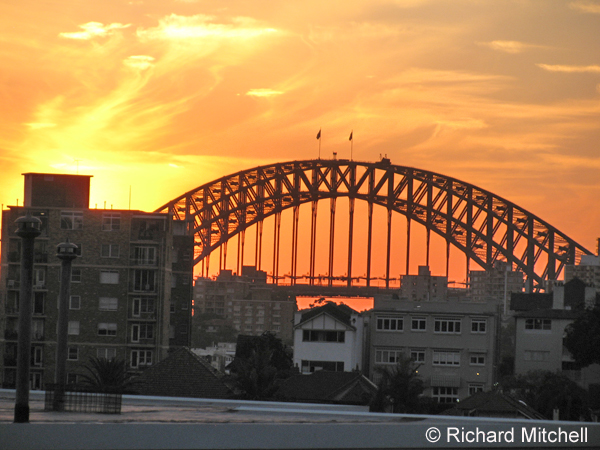
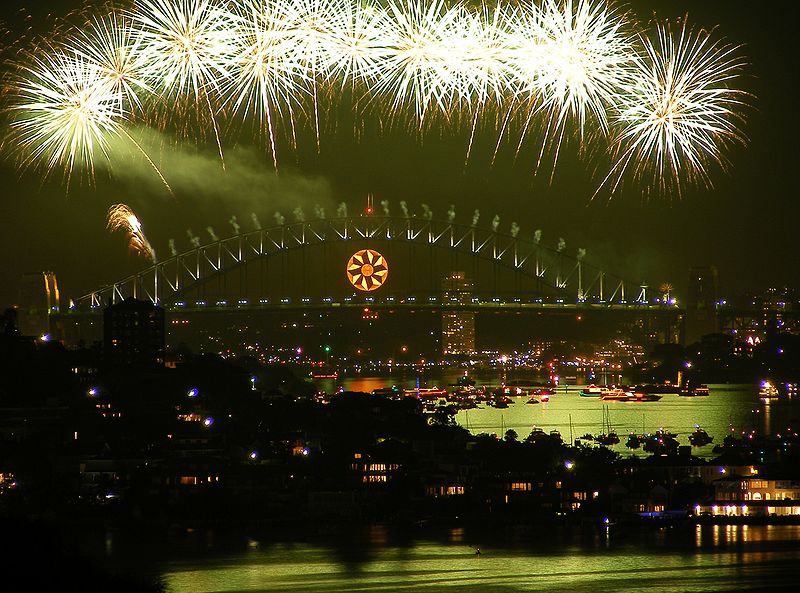
The Sydney Harbour Bridge is one of those
iconic symbols that have become synonymous
with a country’s identity. It is one of
Australia’s most recognisable landmarks and
the backdrop for the country’s New Years Eve
fireworks display that is transmitted around
the world.
 This file is licensed under the Creative
Commons Attribution
3.0 Unported license. It was
added to Wikipedia by Adam J.W.C.
Details can be seen by clicking on the
image.
This file is licensed under the Creative
Commons Attribution
3.0 Unported license. It was
added to Wikipedia by Adam J.W.C.
Details can be seen by clicking on the
image.
Its story began in 1922 when the Government of
New South Wales passed legislation authorising
the construction of a single-span bridge
across Sydney Harbour. The bridge was to
be of a sufficient height above the water as
to allow the passage of the largest ocean
liners. The government appointed J J C
Butterfield as Chief Engineer for the bridge
and he drew up the general design which, at
that time, called for the bridge to carry four
railway tracks, a 57 ft roadway and two
footpaths.
This image is of Australian
origin and is now in the public domain
because its term of copyright has
expired. More details can
be seen by clicking on the image.
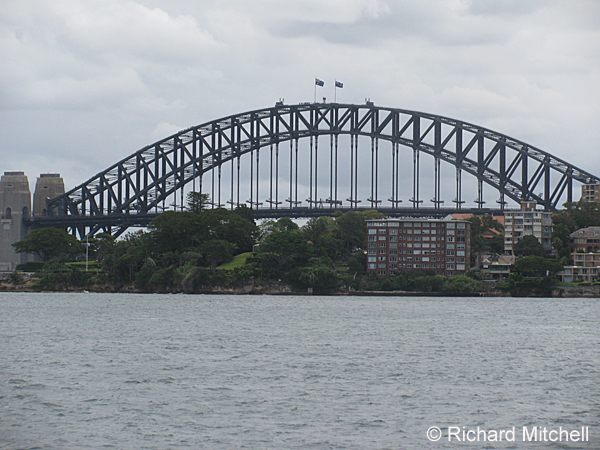
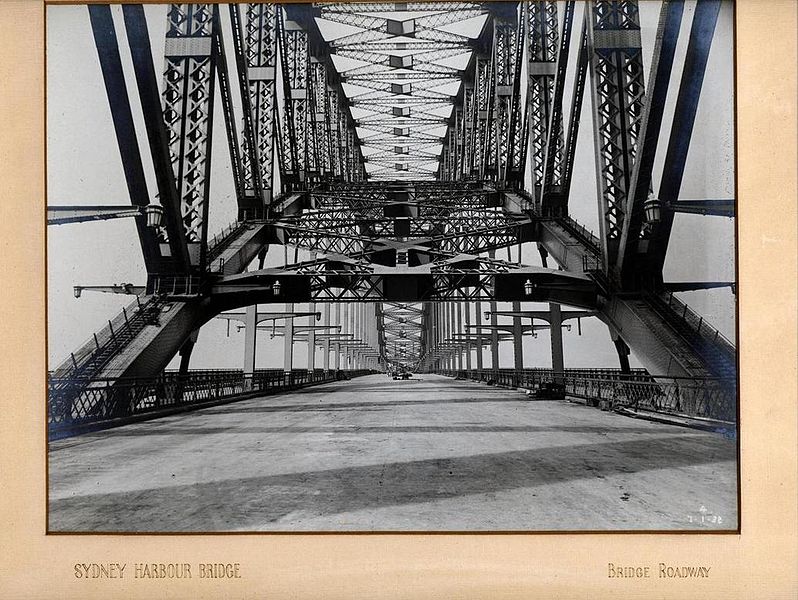
Today, it carries eight traffic lanes and two
railroad lines. There is a pedestrian pathway
on the eastern side of the bridge and a
cycleway on the western side of the bridge.
The actual design and construction of the
bridge was put up for submissions from around
the World and the successful design came from
Dorman Long & Co of Middlesbrough,
UK. They submitted seven proposals that
included both arch and cantilever
designs. The one chosen was for an arch
that provided a headroom at high tide of 170
feet and a span of 1,650 feet making it the
longest in the World at that time. When
the approach spans were included in the
calculation the bridge was 3,770 feet long and
the top of the arch was 450 feet above the
level of the water. The deck was 160
feet wide and taken all together the bridge
involved 37.000 tons of steel and
six million hand driven rivets
Workshops were set up on both ends of the
bridge. The method of construction was
similar to that employed by the company in the
building of the Tyne Bridge in Newcastle, UK
(see below).
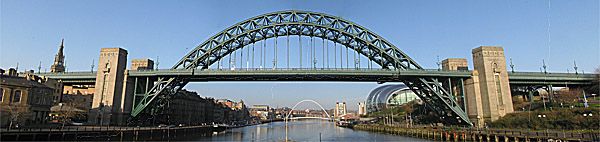
The two bridges are strikingly similar in
design although the Sydney Bridge is
significantly larger.
The New South Wales Government website says
that, “... During the eight years of
its construction from 1924 to 1932, an
estimated total of between 2,500–4,000
workers were employed in various aspects
of its building. They included engineers,
surveyors and architects, blacksmiths,
boilermakers, carpenters and concreters,
stonemasons, riggers, crane drivers,
painters and day labourers."
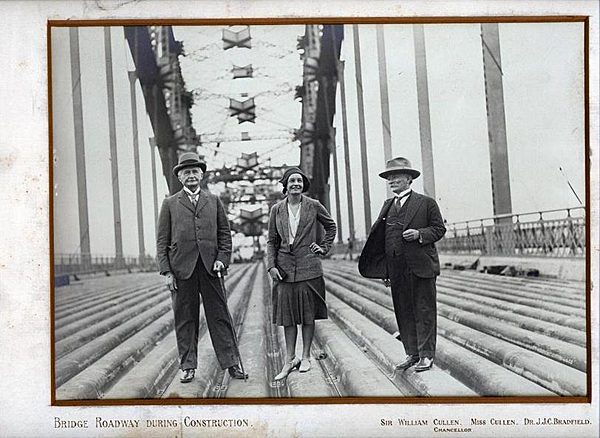
The foundation stone for the bridge was laid
on March 26, 1925 accompanied by quite a
significant ceremony, as you can see
below.

This image is of Australian
origin and is now in the public domain
because its term of copyright has
expired. More details can
be seen by clicking on the image.
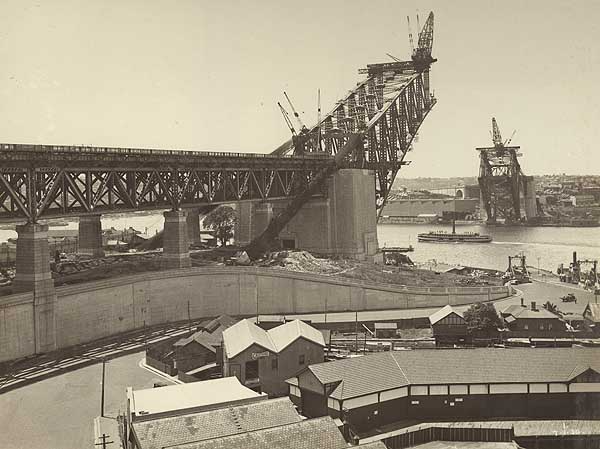
"The first work on the Bridge
was the construction of the Bridge
approaches and the approach spans. ....
This image is of Australian
origin and is now in the public domain
because its term of copyright has
expired. More details can
be seen by clicking on the image.
.... By September 1926
concrete piers had been built to support
the approach spans on each side of the
harbour. An estimated 469 buildings –
homes and businesses on the north side of
the harbour – were demolished with little
or no compensation, to make way for the
construction of the Bridge.
During this time, work began
on preparing the foundations that would
carry the entire weight of the arch span
and its loading. The angled foundations
were built into the side of the abutment
towers. The abutment towers were made of
concrete, but faced with granite from a
quarry at Moruya.”

This
image is of Australian origin and is
now in the public
domain because its term of
copyright has expired.
More details can be seen by clicking
on the image.
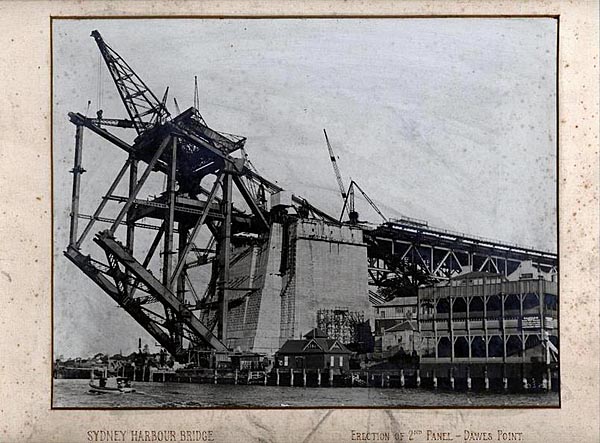
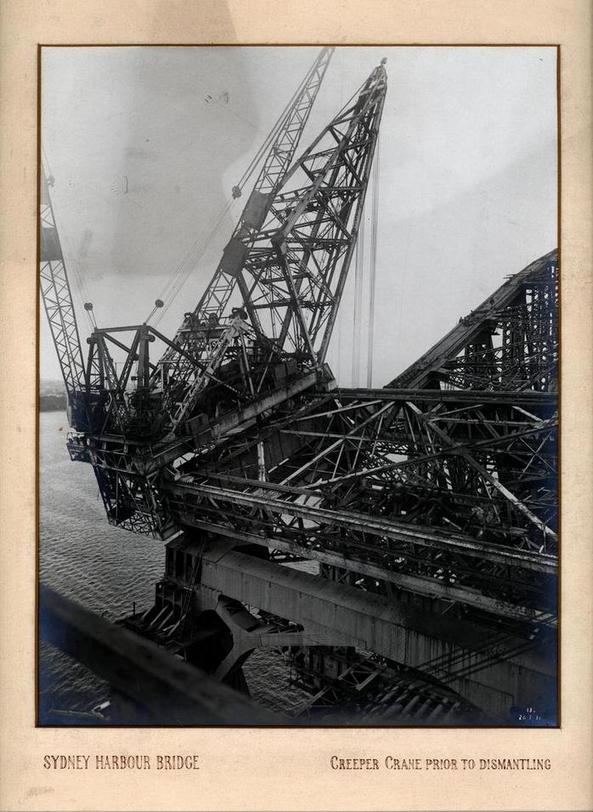
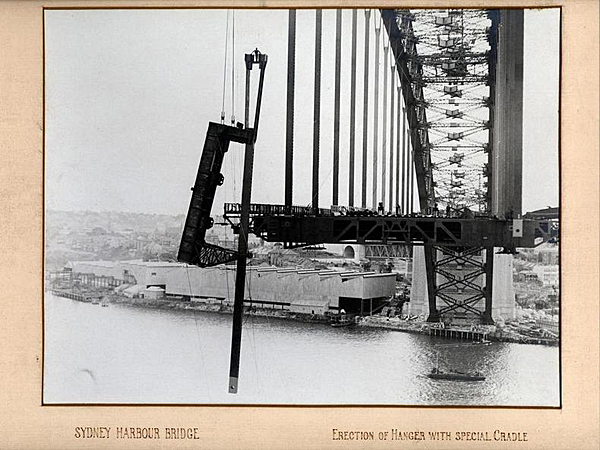
“A giant ‘creeper crane’ was
built on each side to move forward on the
arches they would help construct. ....
This
image is of Australian origin and is
now in the public
domain because its term of
copyright has expired.
More details can be seen by clicking
on the image.
.... They were used to lift
men and materials in a cradle and position
them while erecting steelwork. On each
shore, tunnels were excavated through
which steel cables were passed to fix to
the upper chords of each of the half
arches to prevent their collapse as they
extended out toward each other. On
26 October 1928 the erection of the arches
began. .....
This image is of Australian
origin and is now in the public domain
because its term of copyright has
expired. More details can
be seen by clicking on the image.
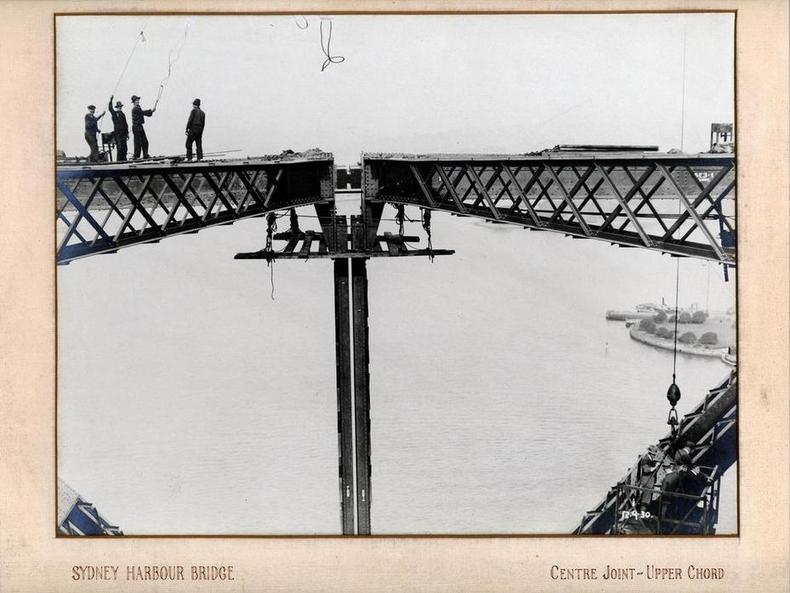
... On 19 August 1930 the two halves
touched for the first time.”
This
image is of Australian origin and is
now in the public
domain because its term of
copyright has expired.
More details can be seen by clicking on
the image.

This
image is of Australian origin and is
now in the public
domain because its term of
copyright has expired.
More details can be seen by clicking
on the image.
This
image is of Australian origin and is
now in the public
domain because its term of
copyright has expired.
More details can be seen by clicking
on the image.
This
image is of Australian origin and is
now in the public
domain because its term of
copyright has expired.
More details can be seen by clicking
on the image.
The image above is of
Australian origin and is now in the public domain
because its term of copyright has
expired. More details can
be seen by clicking on the image.
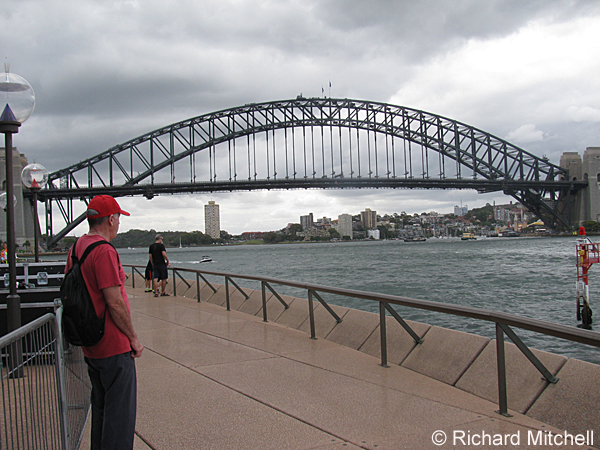
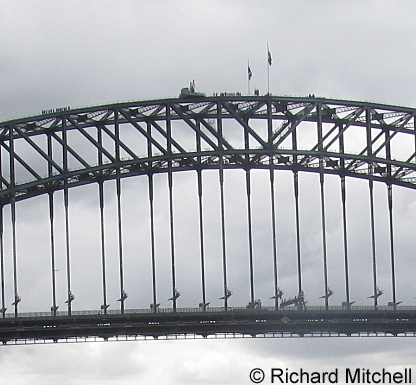
One of the city's tourist attractions is a
guided walk over the bridge. If you look
carefully at the image below you can see two
groups, one at the top of the arch and another
approaching from left.
|
Close
Window
|